 Freshsein
First to form ginger roots is very easy, provided you follow a few steps to keep them from rotting. Plant ginger roots when it’s warm outside, plant them in sphagnum moss or another breathable medium and go easy on the water until they form leaves and can be reported. Watch this quick and simple tutorial with a video.
First of all, here’s a video in which is explain how to grow ginger and other grocery store ingredients such as pineapples, sugar cane and coconuts.
How to Grow your Own Ginger
1. Select a Healthy Root. The best roots (rhizomes) for growing are firm, fleshy and already have green points forming at the end of the ‘fingers.’ If you prefer, cut the ginger into separate pieces with at least one green tip per segment and allow to dry for a few days.
2. Soak the Roots Overnight in warm water. This will stimulate growth and rinse off any chemicals that might be present. A few of my friends have also had a lot of success soaking their various root crops in compost tea, believe it or not!
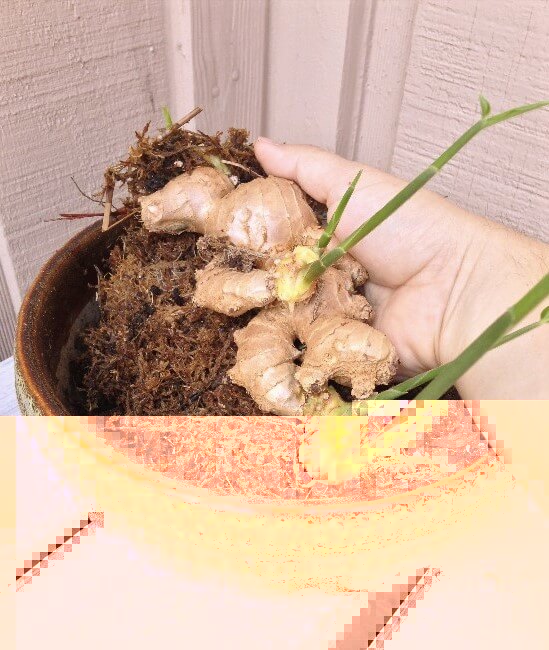
3. Set the Roots in Sphagnum Moss (or coconut fiber) so that the top of the root is visible, with the green growing tips pointing up. I used a propagating tray, but you can use any container wide enough to accommodate the root. Keep the sphagnum moss lightly moist, but allow it to dry out between waterings.
4. Transplant to a Pot once the first leaves have formed. At this point you should notice a mass of fleshy white roots, which can be gently teased loose from the moss. Hold the root just beneath the edge of the pot, and fill the pot with fresh potting mix so that the fine roots are surrounded and the top of the rhizome is barely visible.
5. Caring for Your Ginger is easy, as long as you provide warmth, humidity, moisture and drainage. Summer is the best time to grow ginger because it’s already hot and humid, but if you’re growing it indoors you can place it in a bright windowsill and occasionally mist it with water. Drainage is provided by simply using a pot with drainage holes.
That’s it!